
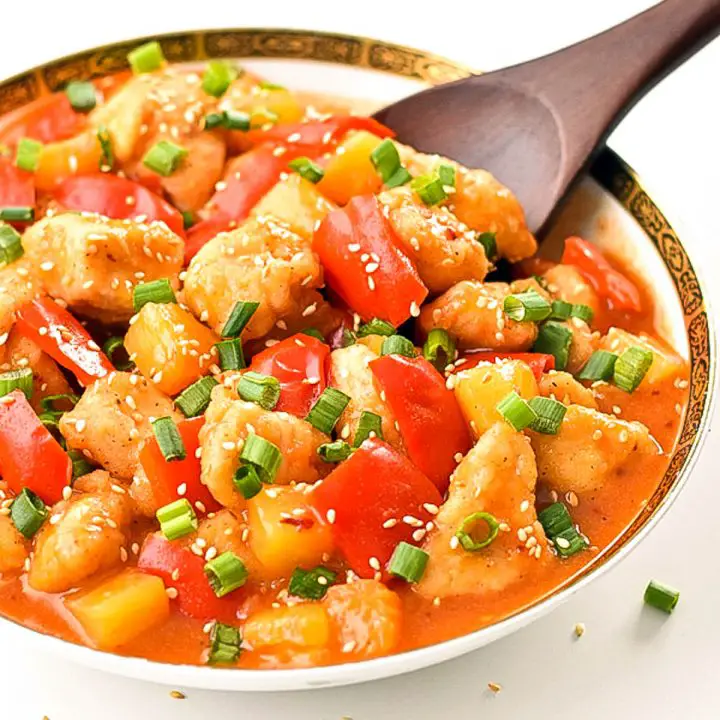
Wow your friends (or just yourself) with this take-out, fake-out Low FODMAP Orange Chicken! A favorite at Chinese restaurants throughout North America, this low FODMAP version made in the air fryer and the Instant Pot or stovetop is a lot healthier while still delivering amazing flavor. While the chicken gets crispy and delicious in the air fryer, the sauce and rice cook in the Instant Pot at the same time using the pot-in-pot rice method. Or, if you don't have an Instant Pot, you can make the sauce and/or rice on the stovetop. In addition to being low FODMAP, this orange chicken is also gluten-free and refined sugar-free.
Jump to:
Why Low FODMAP Orange Chicken in the Air Fryer and Instant Pot?
As you might know, I am a big fan of using small kitchen appliances. The air fryer is great at making the chicken crispy without using a lot of oil, while the Instant Pot can take care of the rest of the meal, which one would have to do in a pot on the stove anyway. The neat thing about using the Instant Pot, however, is that you can cook the sauce AND the rice in it at the same time but keeping them separate so that you can serve the chicken and sauce over the rice when it's all done.
Like with my low FODMAP sweet and sour chicken recipe, which is also made by using the air fryer and Instant Pot in tandem with one another, I use the best of both the air fryer and the Instant Pot to create a healthier, homemade low FODMAP orange chicken. However, if you'd rather make the sauce and rice separately on the stovetop, I have included those instructions as well. Just know that you will have more things to monitor on the stove and more pots to clean in the end.

Necessary Equipment
- Air fryer (I use an Instant Pot Vortex Plus 10-quart Air Fryer, the only size of air fryer I would recommend that anyone buy who plans on doing lots of air fryer cooking beyond potatoes)
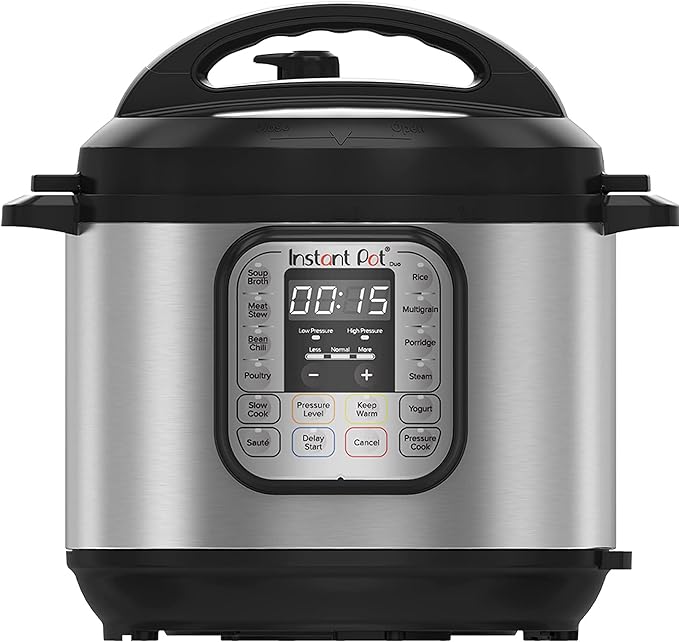
- 6-quart Instant Pot, small sauce pan, or saucier
- Chopping board and knife
- Measuring spoons and cups
- Citrus juicer
- 2 whisks
- 3 large bowls
- Fine mesh sieve
- If making Pot-in-Pot Rice:
- Oven-safe stainless steel or glass bowl around the size of 1.5-quarts and 7.25 x 7.25 x 3.75 inches in dimension (I use this one)
- Trivet that comes the Instant Pot
- Stirring spoons
- Tongs or a fork
- Instant read thermometer
- Small measuring cup or bowl
- Hot pads

Low FODMAP Orange Chicken in the Air Fryer + Instant Pot / Saucepan: Ingredients & Success Tips
This recipe for low FODMAP orange chicken may appear complicated, but it's easier than it looks. If you have any questions or need anything explained differently than what's here, feel free to contact me.
Low FODMAP Orange Chicken Sauce
To start, I whisk together the sauce in the Instant Pot or saucepan first. That way, it's ready to go once the chicken is ready to go in the air fryer. I whisk together the following ingredients in the Instant Pot or saucepan:
- Orange zest from 1 navel orange - orange zest hasn't been officially tested for FODMAPs but is generally believed to be low FODMAP. If you'd prefer to be on the safe side, feel free to leave it out; however, it does add some great orange flavor.
- Juice from 2 navel oranges, freshly-squeezed - according to Monash University's Low FODMAP Diet App, naval oranges do not contain FODMAPs. They also list commercially produced reconstituted orange juice as high in FODMAPs, so you definitely want to use the juice squeezed from fresh naval oranges.
- Pure maple syrup - a natural sweetener that's also low FODMAP.
- Rice vinegar - a vinegar common in Asian cooking and found in most mainstream grocery stores with the other vinegars or in the Asian food aisle.
- Coconut aminos or reduced sodium tamari - soy sauce substitute made from coconut sap or gluten-free soy sauce, respectively. Coconut aminos can be found and a lot of health food stores; tamari can be found at most mainstream grocery stores near the regular soy sauce. If you don't need gluten-free, you can use reduced sodium soy sauce instead.
- Sea salt
- Red pepper flakes (optional) - low FODMAP but can irritate people sensitive to spicy food.

Once the sauce is whisked together, I set the Instant Pot or saucepan aside while I prepare the:
Gluten-Free Breaded Chicken
If your air fryer doesn't have a built-in preheat function, I recommend preheating it for 10 minutes at 400°F. Otherwise, I bread the chicken before turning on my Instant Pot Vortex Plus 10-quart Air Fryer, letting it do its own preheat, and then adding the chicken to it when it says "Add Food" per the manual instructions.
I add the chopped chicken cubes to a large bowl. Then, I add ¼ cup of tapioca flour and toss the chicken with my hands to coat. Lastly, I add 2 tablespoons of garlic-infused olive oil to the bowl and toss the chicken again to coat in oil.
In a separate large bowl, I whisk the following breading ingredients:
- Quinoa flour - another low FODMAP gluten-free flour that's supposed to be one of the healthiest flours you can eat. If you are reluctant to buy it just for this recipe, you can also use it in my Low FODMAP Air Fryer Fish and Chips recipe. I talk more about quinoa flour in that post, if you're interested.
- Sea salt (in addition to what's already in the sauce)
- Ground black pepper
Then, I dredge the chicken pieces in the breading mixture a few at a time, shaking off the excess flour, and setting them on a large plate.
Pot-In-Pot Rice (Optional)
Then, I return to the Instant Pot and set up my pot-in-pot rice. I pour 1 cup of basmati or long grain white rice into a fine mesh sieve and rinse in cold water. Add the rice and 1 cup of cold water to an oven-safe stainless steel or glass bowl. I use this one that's stainless steel, 1.5-quarts and 7.25 x 7.25 x 3.75 inches in dimension. You don't have to use exactly the same bowl but it needs to be oven safe, small enough to fit in the Instant Pot but large enough to hold all of the rice and water, which will boil and rise up slightly while being pressure cooked. Then, I stir the rice.
I set the trivet that comes with the Instant Pot into the Instant Pot containing the sauce, handles up, like so:

Then, I place the bowl containing the rice and water on top of the trivet, like so:

I close the lid, set the pressure release valve to "Sealing," press "Pressure Cook," and set the timer for 5 minutes. Once the cooking cycle completes, I allow the Instant Pot to naturally release for 10 minutes. Then, I manually release the remaining pressure.
If Not Making Pot-in-Pot Rice
If not making pot-in-pot rice, I skip the rice part (obviously), close the lid, set the pressure release valve to "Sealing," press "Pressure Cook," and set the timer for 5 minutes. Once the cooking cycle completes, I allow the Instant Pot to naturally release for 10 minutes. Then, I manually release the remaining pressure. It's the same cooking procedure with or without the rice.
If Making the Sauce in the Saucepan
If making the sauce in the saucepan, I place the saucepan containing the sauce ingredients on medium high heat on the stovetop, whisking occasionally. Once the sauce starts a slow boil, I reduce the heat to low and simmer for 10 minutes, whisking occasionally.
If Making Rice on the Stovetop
If making the rice on the stovetop, I prepare it per the package instructions. These can differ slightly between basmati and long grain white rice.
Add Chicken to Air Fryer
If I'm using any air fryer other than the Instant Pot Vortex Plus, I typically spray the pan with avocado oil cooking spray (you can use your preferred cooking spray) before adding anything to it. The Vortex Plus pans don't need to be sprayed (another reason why I recommend that air fryer over any others).
I put the Vortex Plus pans on a baking sheet and add chicken pieces to the pans, leaving a little space between each piece as best I can (sometimes I can't), like so:

Depending on the size of your air fryer, you may have to air fry the chicken in two batches. Using the Vortex Plus, I only need to cook the chicken in one batch. I spray the tops of the chicken with cooking spray before setting the pans into the air fryer.
If using the Vortex Plus, I place one pan on the top rung and the other on the bottom rung.
Air Fry Chicken
I air fry the breaded chicken for 8 minutes at 400°F, flipping halfway through using tongs or a fork and spraying the tops again with cooking spray after flipping. Using a fork to flip smaller pieces of food tends to be easier than tongs. If using an Instant Pot Vortex Plus Air Fryer, I add the chicken after the Vortex tells me to "Add Food." When it tells me to "Turn Food," I remove the trays from the air fryer to a baking sheet, flip the chicken, and switch the tray that was on the top rung to the bottom rung and vice versa.
Once the timer dings, I check the temperature of the thickest piece of chicken using an instant read thermometer. Chicken must be 165°F to be safely consumed. I place the cooked chicken pieces in a large mixing bowl. If cooking in batches, I repeat these steps for the other half of the chicken.
I add the cooked chicken to a mixing bowl and return to my Instant Pot.

Cancel and Open Instant Pot
Once the Instant Pot cooking cycle completes, I hit "Cancel" on the Instant Pot, quick release the pressure, open the lid, and allow the steam to dissipate for a minute. If making pot-in-pot rice, using hot pads, I remove rice bowl to a plate to rest and remove the trivet.
Thicken Sauce (Instant Pot)
To thicken the sauce using the Instant Pot, in a small measuring cup or bowl, I whisk together 1 teaspoon tapioca flour with 1 teaspoon cold water to make a slurry. Then, I hit the "Sauté" button on the Instant Pot and wait a few seconds for the liquid to start boiling. While slowly whisking the liquid, I add the slurry and whisk constantly until the sauce thickens, about 1 minute. Then, I hit "Cancel" on the Instant Pot, and using hot pads, remove the inner pot from the Instant Pot and place on a hot pad.
Thicken Sauce (Saucepan)
To thicken the sauce using the saucepan, in a small measuring cup or bowl, I whisk together 1 teaspoon tapioca flour with 1 teaspoon cold water to make a slurry. While slowly whisking the sauce, I slowly pour the slurry into my simmering saucepan and whisk constantly until the sauce thickens, about 1 minute. Then, I remove the saucepan from the heat.

Cover the Chicken in Sauce
I return to the bowl containing the cooked chicken, pour the orange sauce over the chicken, and stir with a large spoon to coat. I allow the orange chicken to sit uncovered for 5 minutes. This provides time for the sauce to soak into the chicken breading, making it a more cohesive-tasting dish.
Fluff & Serve
Finally, I fluff the rice in the bowl, serve my low FODMAP orange chicken over the rice, and garnish with fresh chopped chives (optional). I also serve the chicken and rice with a vegetable side dish, such as steamed broccoli. Monash University lists broccoli as low FODMAP in quantities of up to ¾ cup per serving. You could also skip the rice and simply serve the orange chicken over broccoli. I tried making broccoli in the Instant Pot along with the orange sauce, and it simply does not turn out well. I recommend cooking the broccoli separately.
Print
Low FODMAP Orange Chicken (Air Fryer + Instant Pot / Stovetop)
- Total Time: 30 minutes
- Yield: 4 servings 1x
- Diet: Gluten Free
Description
This low FODMAP Orange Chicken made in the air fryer and the Instant Pot or stovetop delivers the same amazing flavor of the take-out version without the calories! Gluten-free and refined sugar-free.
Ingredients
Low FODMAP Orange Chicken Sauce:
- 1 teaspoon orange zest (from 1 navel orange*)
- ¾ cup juice from 2 navel oranges, freshly-squeezed*
- ¼ cup pure maple syrup
- 3 tablespoons rice vinegar
- 1 tablespoon coconut aminos or reduced-sodium tamari sauce*
- 1 ¼ teaspoons sea salt
- ¼ teaspoon red pepper flakes (optional*)
- 1 teaspoon tapioca flour
- 1 teaspoon cold water
Gluten-Free Breaded Chicken:
- 1 pound chicken breasts (about 2 large breasts), chopped into 1-inch cubes
- ¼ cup tapioca flour
- 2 tablespoons garlic-infused olive oil
- ¼ cup quinoa flour
- 1 teaspoon sea salt
- ¼ teaspoon ground black pepper
- Avocado oil cooking spray (or your preferred cooking spray)
Pot-in-Pot Rice (Optional):
- 1 cup basmati or long-grain white rice
- 1 cup cold water
Garnish (Optional):
- 2 tablespoons fresh chives, chopped
Instructions
- Prep ingredients: Prepare all ingredients per the list above before starting to cook.
- Prepare the sauce: In your 6-quart Instant Pot or a small saucepan, whisk together orange zest, orange juice, maple syrup, rice vinegar, coconut aminos or tamari, sea salt, and red pepper flakes (if using them). Set pot aside for now.
- Preheat air fryer: If your air fryer doesn’t have a built-in preheat, preheat air fryer to 400° F for 10 minutes; otherwise, prepare chicken before turning on your air fryer (I use an Instant Pot Vortex Plus 10-quart Air Fryer) and wait until it tells you to "Add Food" before adding the chicken.
- Bread chicken: While the air fryer is preheating, place chopped chicken in a large bowl. Add tapioca flour and toss chicken with your hands to coat. Add the garlic-infused olive oil and toss again to coat. In another large bowl, add quinoa flour, sea salt and ground black pepper and whisk to combine. Dredge the chicken pieces in quinoa flour mixture a few at a time, shake off the excess flour, and place on a large plate.
- Prepare Pot-in-Pot Rice (Optional): If you’re planning on making rice in your Instant Pot using the pot-in-pot method, pour 1 cup of rice into a fine mesh sieve, rinse with cold water, and drain. Pour the rice into an oven-safe stainless steel or glass bowl (I use this one. It's stainless steel, 1.5-quarts and 7.25 x 7.25 x 3.75 inches in dimension). Add 1 cup cold water to the bowl and stir. Place the trivet (that comes with the Instant Pot) inside your Instant Pot containing the orange sauce with the handles up. Place the bowl with the rice and water on top of the trivet. See photos in the post above for more information.
- Pressure Cook (with or without the Pot-in-Pot rice): Close the Instant Pot lid, set the pressure release value to “Sealing,” press the "Pressure Cook" button, and set the timer for 5 minutes. Once the cooking cycle is complete, allow the pressure to naturally release for 10 minutes, and then manually release the remaining pressure.
- If making the sauce in a saucepan: Place the saucepan containing the sauce on medium high heat on the stovetop, whisking occasionally. Once the sauce starts a slow boil, reduce heat to low, and simmer for 10 minutes, whisking occasionally.
- If making rice on the stovetop: Prepare per package instructions.
- Add chicken to air fryer pan: If food tends to stick to your air fryer pan, spray it with cooking spray. Add chicken pieces to the air fryer pan(s), leaving a little space between each piece as best you can. Depending on the size of your air fryer, you may have to air fry the chicken in two batches. Spray the tops of the chicken with cooking spray.
- Air fry chicken: Air fry for 8 minutes at 400°F, flipping halfway through using tongs or a fork (a fork tends to be easier for small pieces of food) and spraying the tops again with cooking spray after flipping. If using an Instant Vortex Plus Air Fryer, when the Vortex tells you to "Turn Food," remove trays from the air fryer to a baking sheet, flip the chicken, spray the tops with cooking spray, and put the tray that was on the bottom rack on the top rack and vice versa. Once the timer dings, check the temperature of the thickest piece of chicken using an instant read thermometer. Chicken must be 165°F to be safely consumed. Place the cooked chicken pieces in a large mixing bowl. If cooking in batches, repeat these steps for the other half of the chicken.
- Cancel and open Instant Pot: Once the Instant Pot cooking cycle completes, hit "Cancel" on the Instant Pot, quick release the pressure, open the lid, and allow the steam to dissipate for a minute. If making pot-in-pot rice, using hot pads, remove rice bowl to a plate to rest. Remove trivet.
- Thicken sauce (Instant Pot): In a small measuring cup or bowl, whisk together 1 teaspoon tapioca flour with 1 teaspoon cold water to make a slurry. Hit the "Sauté" button on the Instant Pot and wait a few seconds for the sauce to start boiling. While slowly whisking the sauce, add the slurry and whisk constantly until the sauce thickens, about 1 minute. Hit "Cancel" on the Instant Pot, and using hot pads, remove inner pot from the Instant Pot and place on a hot pad.
- Thicken Sauce (Saucepan): In a small measuring cup or bowl, whisk together 1 teaspoon tapioca flour with 1 teaspoon cold water to make a slurry. While slowly whisking the sauce, slowly pour the slurry into your simmering saucepan and whisk constantly until the sauce thickens, about 1 minute. Remove the saucepan from heat.
- Cover chicken in sauce: Return to the bowl containing the cooked chicken. Pour the thickened orange sauce over the chicken and stir with a large spoon to coat. Allow to sit uncovered for 5 minutes.
- Fluff & serve: Fluff the bowl of rice using a fork, serve the low FODMAP orange chicken over the rice, and garnish with chopped chives (optional). Serve with a vegetable side, such as steamed broccoli (low FODMAP in quantities of up to ¾ cup per serving per Monash University).
Equipment
 Buy Now →
  Buy Now →
  Buy Now →
  Buy Now →
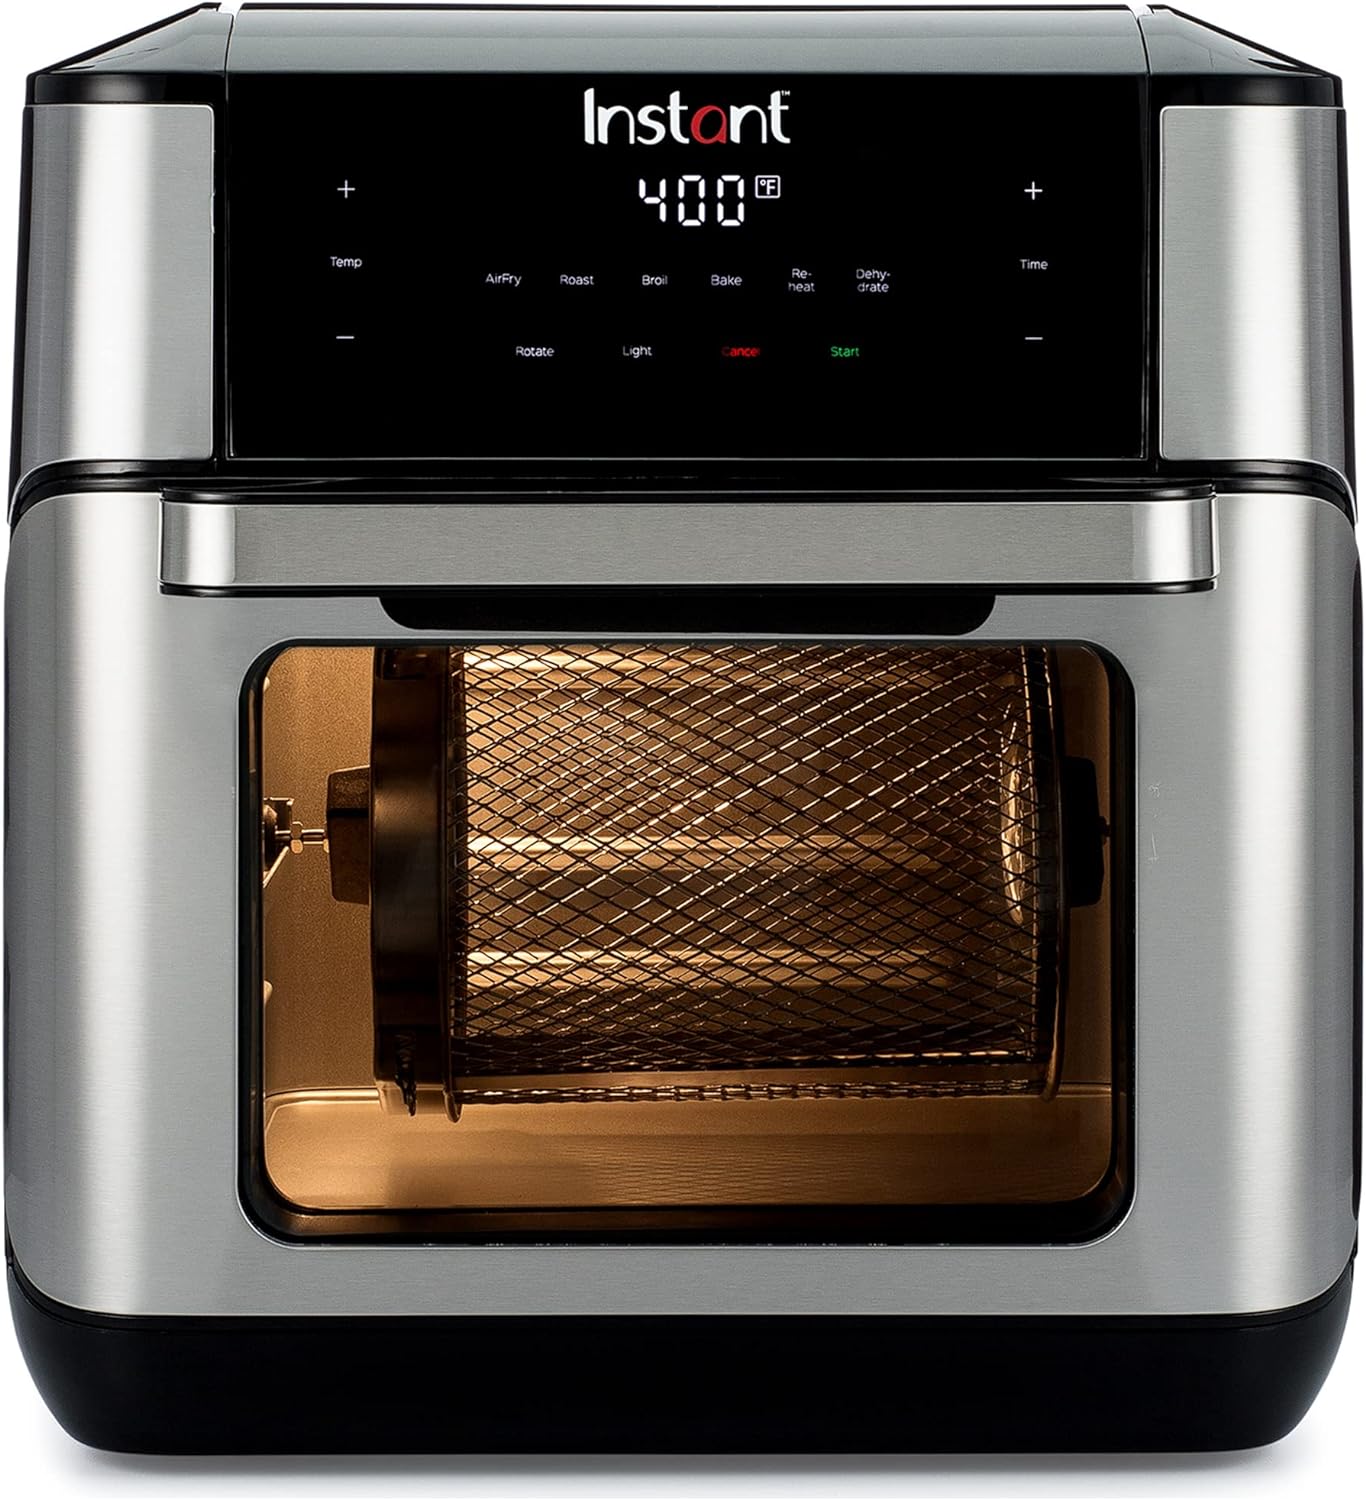
Instant Pot Vortex Plus 10-quart Air Fryer
Buy Now → Buy Now →
oven safe stainless steel bowl
Buy Now → Buy Now →
  Buy Now →
  Buy Now →
 Notes
- This orange chicken recipe is best when served fresh.
- Orange zest: According to Monash University’s Low FODMAP Diet App, orange zest has been recently tested and was found to be low FODMAP in servings of up to the zest from one orange or 5 grams per serving (with no upper limit listed).
- Naval oranges: do not contain FODMAPs according to Monash University. They list commercially produced reconstituted orange juice as high in FODMAPs, so it’s important to use freshly-squeezed orange juice from navel oranges.
- Coconut aminos: If not needing gluten-free, you can use reduced sodium soy sauce instead of coconut aminos or tamari.
- Red pepper flakes: Although low in FODMAPs, some people react poorly to them for reasons having nothing to do with FODMAPs. Consult your doctor or dietitian before adding red pepper flakes to this orange chicken recipe if you have concerns about how your body might react to it.
- Prep Time: 15 minutes
- Cook Time: 15 minutes
- Category: Dinner
- Method: Air Fryer + Instant Pot / Stovetop
- Cuisine: Chinese-inspired


Julie says
This was wonderful! I love my air fryer and this was a great recipe!
Gail says
I'm so glad you liked it, Julie! Thanks for trying it and taking the time to rate and review the recipe!